Channel Viewer Webpage Walkthrough
The Medievia MM2K6 install comes with this script, but if you do not have it a link is supplied below.
Using the Channel Viewer and Logger in 5 easy steps or less! You can choose to use only the viewer and stop at step 2.
The following channels are sent to the new window:
Asay - Auction - Avatar - Bloodline - CE - Channel Logs - Clan - Clsay - Develop - Dream - Form - Gossip - Hint - Imm - Legend - Med Global Chat - Politics - Qauction - Quest - Say - Shout - Telepath - Town - Whisper
Step 1 - Opening a New Session Window for the Channel Viewer (BASIC)
Ok, we're going to walk through how to open a new session window, which will be where all of the channels go.
Before you do anything make sure that you are logged into Medievia, this is the main window where you play. The new window we will make now will be where the channels will go. This seems like we are making a new character but we are actually making the channel window.
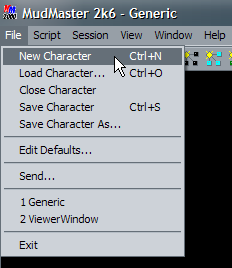
First, while in MudMaster, click File, then New Character. Like this:
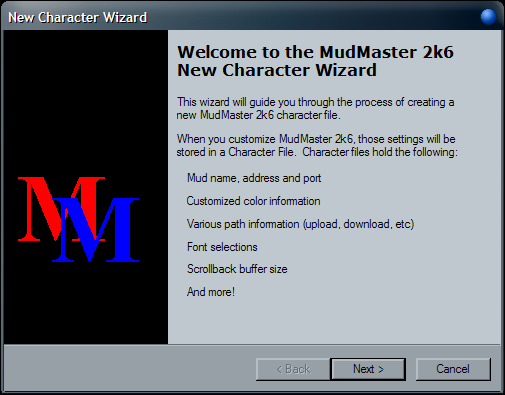
Next a window titled "New Character Wizard" pops up:
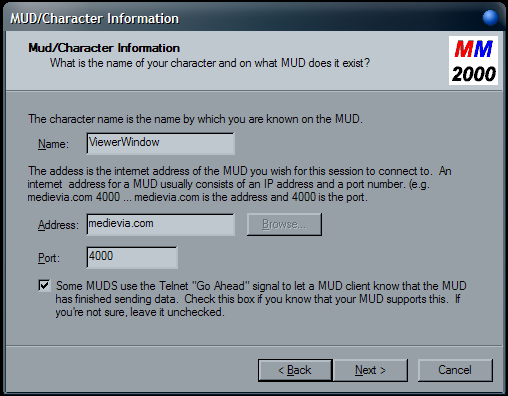
Now a window containing your Character Name, session address and port will pop up. The character name will determine the name of the window, which we will need to know for the next step. Here's a generic shot of it filled out:
Click NEXT.
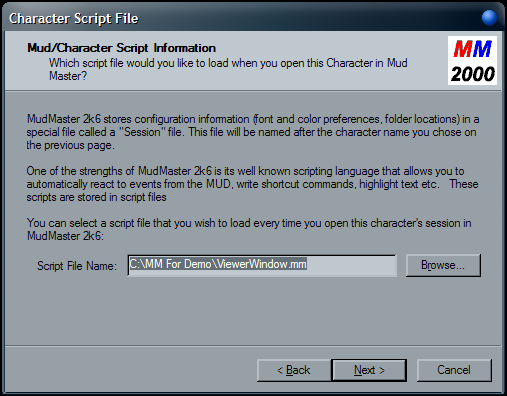
Here is where you specify the path and filename of the script it saves and loads, which means the folder and name of the file (example: C:\MudMaster 2k6\ViewerWindow.mm) Here's another generic shot, your path will most likely be different and prefilled out correctly:
Click NEXT.
Now a window with an option to make it load that character each time MudMaster starts, or to have it load that window now. If this is the window you want to have channels be viewed on ONLY, don't have it load each time, but load it now. Here's what I mean:
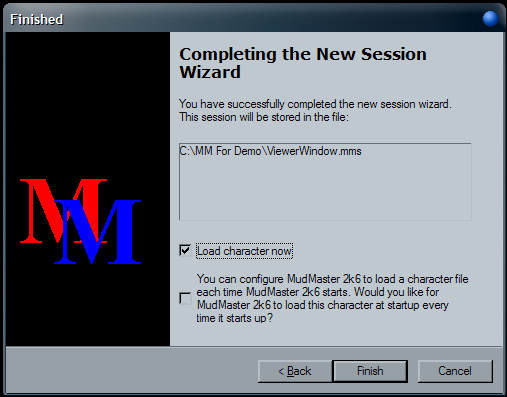
Click FINISH.
Note from author: I have my MM2k6 set to load my window that accesses Medievia with a command in it to load my viewer window at the same time. Here's how:
/autoexec {/loadsession {C:\MudMaster2k6\ViewerWindow.mms}}
Notice it's the path and filename of the viewer windows character file.
Before the next step size and place the two windows how you want.
Note that if you had your main window maximized you may have to use the Window menu pulldown to tile or cascade the windows before you can place them.
You may want to change the font in your new window to a small font you like, this window does not need to be the Medievia font. To do this select the new window, pull down sessions menu and click options. Click Term/Input tab and look for the font button.
Now save all of your windows by selecting them and then doing a "File->Save Character" in the drop down menu. Do this when you change anything about any window in the future.
Step 2 - Installing the script and making it work (BASIC)
This step is blessedly short.
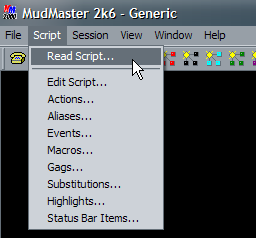
In MudMaster make sure your main window, not the new one, is selected and then, click "Script" then "Read Script" and open the file. It will look something like this:
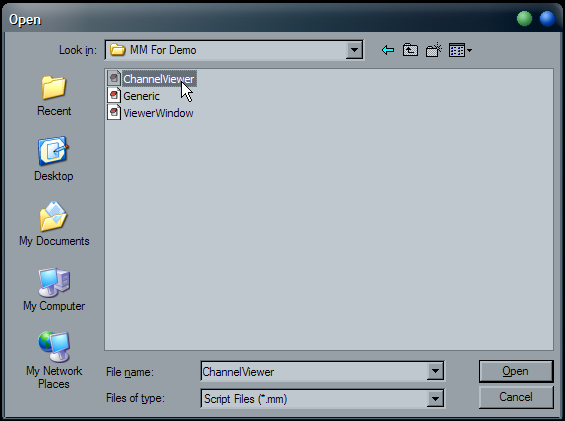
If ChannelViewer.mm is not there or if you think we may have updated the script then download the ChannelViewer.mm script and try again.
Now the script is read and we need to start it!
Make sure you have the main window selected and input this just as if you were sending it to the game:
schv {Session Window Name you want viewer on}
Here is an example:
schv ViewerWindow.mms
Basically just look at the new window and use the same name.
If you enter the command more than once with another name, it will send the messages to that window as well. You can use this script in countless ways, as you will see below if you feel adventurous.
SAVE all of your windows by selecting them and then doing a "File->Save Character" in the drop down menu.
Ok Done! Channel Viewer should be sending channel messages to your viewer window.
Help commands are:
chvhelp
and
chvlhelp
Just enter them as if you were sending the command to the game.
You can stop here and it will be that easy, it is done and complete, however this script contains way more features than that. Go to the next step to learn these other features now or later if you wish to learn more about this script.
Step 3 - Channel Viewer Options (INTERMEDIATE)
Ok, in this step we'll cover the Channel Viewers options to help optimize your preferred look.
I already covered how to add window names into a list in step 2, but I'll go over it again. If you use:
schv {Window Session Name}
It will add that name into the list of names it will send channel messages to. To remove a name, type:
schvrem {Window Session Name}
To view the window(s) it will send channel messages to, check the bottom of the help command:
chvhelp
You can specify which channels to have the viewer send, like if global chat gets too spammy you can just have it stop. Switching off the channel works too. To see the channel options, type:
setchan
To toggle a viewer channel, type:
setchan {Channel #}
This works the same way in principle that "setcomm" in Medievia does.
Note: for those who are also going to use the logger, there is a log for every channel the viewer uses, use "chvlhelp" to see them all.
Have you noticed the timestamp on the channel messages the viewer sends? If you type "chvtime" from the sending window, it will toggle this on and off.
Channel lines too close together? Type "chvs" to toggle a space between each message line.
Lastly, the Channel Viewer can be turned on or off using:
chv on
chv off
Respectively.
Step 4 - Using the Logger (INTERMEDIATE)
In making this Channel Logger I tried to hold to the spirit of Medievia's In-Game Logger commands. Knowing this, just put an "x" in front of that same command and it will access the in-script logs. You can even use the same abbreviations for logs that you use in the game. Here's an example:
xcllog
This can even be shortened as low as:
xcll
For a complete list of commands and just how far you can abbreviate those commands, check out "chvlhelp".
Here's a Bloodline Log example, but shows all the possibilities of a single channel:

Even though there is not an in-game command to access any sort of log for channels like Auction, every viewer channel gets logged. So commands like:
xauclog
xauctionlog
Will show you the in-script records it has stored for Auction.
To search for text just put the search words after the log command, like this:
xchatlog ghoti
Or as short as:
xchatl ghoti
You can also use a number as the search, and it will tell show you that many entries, always showing the most recent. Here's an example:

This will show the 10 most recent Current Events.
For a complete list, type "chvlhelp" into MudMaster with the script running.
Step 5 - Logger Extended Features (EXPERT)
The features for the logger are easy if you know the original commands for accessing the log.
First we'll start with using the Channel Logger Search over chat.
Remember the bloodline log example? We just add a "c" to the front of the command, like this:
cxtelllog ghoti
This will put the search results for "ghoti" from the telepath logs over chat.
Here's what the command looks like:

The last feature is the ability to recall log data from another window. This requires a bit more preparation though. Both the window you want the data to go to and the window you want to retrieve the data from have to have ChannelViewer.mm read into it.
Next, in the window you want the data to go to, type
schvl {Name of Window to retrieve data from}
Once it knows where to retrieve data from, we use the same log and search commands, but instead we add another "x" in front. This is an example:

Or as short as,

This will access all Quest logs from every window you specify.
The same search criteria will work like before too:

This will search all Current Event logs from each window you have set for the text "ghoti".
------------------------------------------------------------------------
That's it! You now know how to setup the viewer and logger, and use all the features of both.
Pseibre is our client god. If you have any questions you can tell to him in the game or shoot off an email to Pseibre.
Copyright © 1992-2019 Medievia.com, Inc.
All Rights Reserved.
For more information contact: Webmistress: Soleil
|


